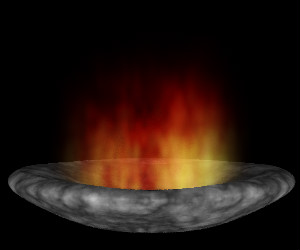

Here is the procedure:
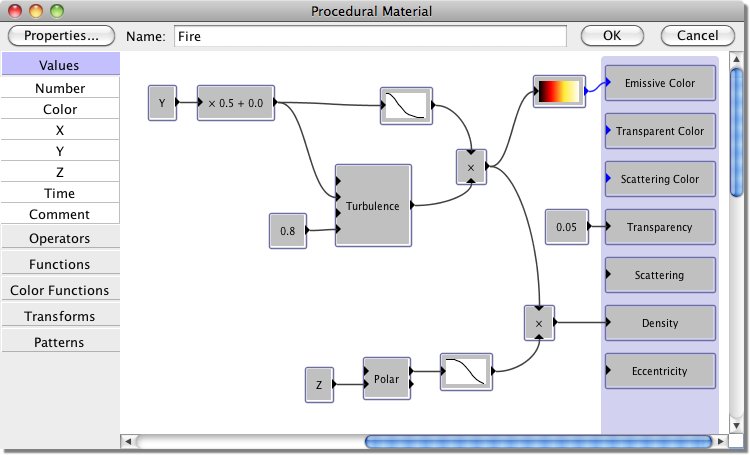
A Turbulence function is used to select a color, ranging from white (for the hottest parts of the flame) through yellow and red to black (for the coolest parts). Note that the Y coordinate is multiplied by 0.5 to stretch the flames in the vertical direction. The same turbulence function is used to determine the density of the material, so that the hottest parts (which would be giving off the most light) are most opaque.
The turbulence function is multiplied by a decreasing function of Y, so that the flames fade away to black at their tops. In addition, a Polar transform module is used to calculate the distance from the Y axis, and the density is multiplied by a decreasing function of it. This causes the fire to smoothly fade away at its edges.
The Transparency is set to a very small value (0.05). This makes the fire mostly but not entirely opaque. On the other hand, the "Casts Shadows" option in the Properties window is turned off - fire should give off light, not absorb it.
The stone texture, of course, is also procedural. It is simply a Turbulence function going into a custom color function.
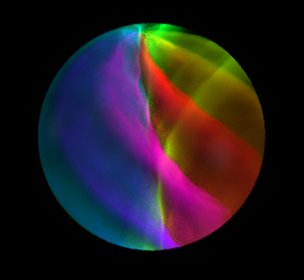
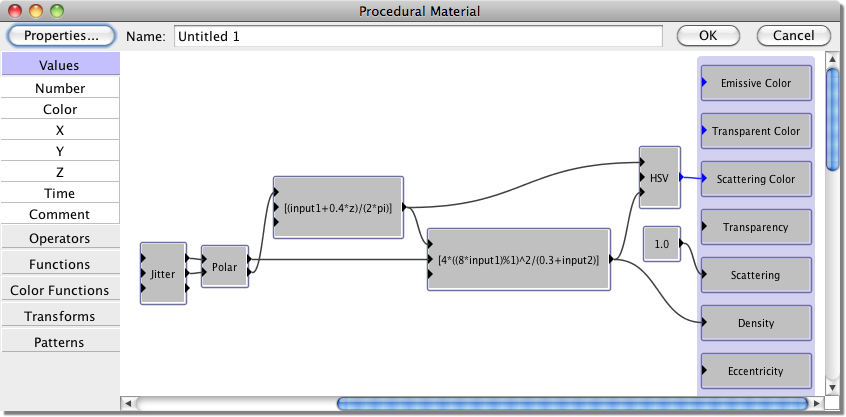
The procedure doesn't involve many modules, but there are some complicated expressions, so let's take it one step at a time.
We begin with a Polar module to transform X and Y to R and Theta. We want a series of bright colors as we go around the circle. Theta goes from 0 to 2π, so the first Expression module divides it by 2π. This gives a value that goes from 0 to 1 as we go around the circle, just right to use as the Hue input for an HSV module. We also want to create a swirled effect, so we add 0.4*Z to Theta. This causes the colors to rotate as we move up or down in the Z direction.
So far we just have a smooth color gradient, but we actually want a series of distinct bands with gaps between them. The second Expression module accomplishes this by computing a value that is large in the bands and small in the gaps. We use this to control both the material density and the brightness of the scattering color.
It starts with the output of the first Expression module, which goes from 0 to 1 around the circle. Multiplying by 8 then taking the result mod 1 produces a value that goes from 0 to 1 eight times around the circle, just right to give eight bands. Squaring it makes the bands sharper. We also want the colors to be brightest at the center, then fade slightly toward the outside. We accomplish this by dividing by 0.3+R.
Finally, we use a Jitter module to add some disorder to the pattern and make it less perfectly symmetrical. This gives the proper appearance for a handmade ornament.
Of course, I didn't just write these expressions off the top of my head. It took a lot of experimenting to figure out how to get the effect I wanted. The procedure editor makes this very easy, since you can make changes and instantly see the effect of them.